So there I was, Saturday morning, staring at my trainers in absolute horror. You know those white Adidas I got for my birthday? Well, they were no longer white. More of a miserable, sad beige with mysterious brown splodges. I was wearing them to a mate’s barbecue the week before and it seems my idea to walk through his muddy garden hadn’t been the smartest I’d ever had.
“Christ, what happened to those?” my brother said, entering the kitchen. Thanks for the support, mate.
I was seriously thinking about binning them when my flatmate Emma got home from her cleaning job. She takes one look at my tragic footwear situation and replies, ‘OK, where’s your bicarbonate of soda? I’m thinking she’s lost the plot… “The baking stuff?” But she is already rifling through my cupboards like she lives here.
Turns out Emma knows her stuff. Who knew?
Why Bicarbonate Of Soda Is Actually Magic
Now, I am not normally one for domestic cleaning hacks. Half the time they are total garbage and don’t work. But this bicarbonate business? It’s legit.
The stuff’s got this weird ability to break down all the grime and muck that gets ground into your trainers. And it solves the stink problem, which, frankly, was kind of getting to be an issue. My trainers were starting to clear rooms.
The best bit is how cheap it is. Fifty pence from Tesco buys you a box that’ll last months. Compare that with the posh trainer cleaning kits they peddle for twenty quid. Absolute daylight robbery, if you ask me.
Emma explained it’s something to do with being alkaline. I nodded along, pretending I understood, but honestly I just cared that it worked.
The Actual Method (That Actually Works)
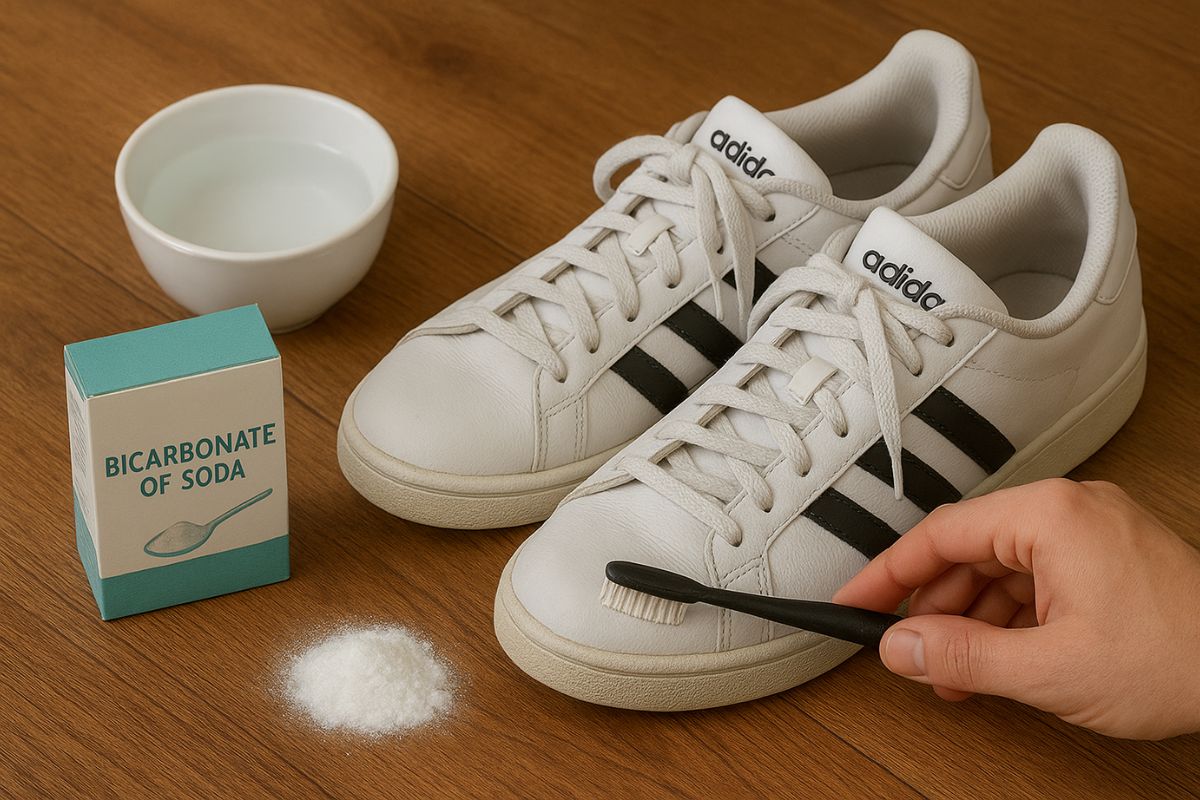
Oh, now pay attention because this is crucial. First things first, take out the laces. I know, I know, it’s a faff. But believe me, this is how you’ll get a real job done. Put the laces in a bowl of warm water along with a spoonful of the bicarbonate. They can soak in the meantime while you tackle the underlying issue.
Just grab a couple of tablespoons of bicarbonate powder. Add water bit by bit until you’ve got something that looks like thick toothpaste. You don’t want it too runny, as I learned this lesson the hard way when it all slid off my trainers onto the kitchen floor. What a mess.
Now grab an old toothbrush. Not your good one, obviously; my mum went mental when she caught me using hers. Work this paste into your trainers using circular motions. Don’t go crazy with the scrubbing, though. Steady does it.
The toe bit and around the sole; that’s where all the worst muck lives. Spend proper time on those areas. Get right in there with the brush.
The Boring Wait (But It’s Worth It)
Once your trainers look like they’ve been attacked by a snowman, leave them alone for at least half an hour. I usually stick the kettle on and have a brew while I wait. The bicarbonate needs time to do its thing.
After waiting, get a clean wet cloth and wipe all the paste off. You’ll see all the dirt coming away; it’s quite satisfying actually. For any stubborn bits, give them another scrub with more paste.
Rinse them properly with clean water. Don’t skip this bit or your trainers will feel gritty when they dry. Nobody wants sandpaper shoes.
Stuff them with newspaper to keep their shape. Leave them somewhere airy to dry, but not on a radiator. Heat warps the rubber and loosens the glue. Found that out the expensive way.
Sorting The Pong Problem
This is where bicarbonate of soda really comes into its own. Smelly trainers are grim, and we’ve all been there.
Chuck a tablespoon of the powder into each shoe. Give them a good shake to spread it about. Leave overnight; the bicarbonate soaks up all the moisture and kills the smell.
Tip it all out in the morning and hoover up any stubborn bits. Word of warning though: make sure you get every last grain out. The stuff can irritate your skin if you wear the trainers without socks. Learned that one the itchy way.
What I Got Wrong (So You Don’t Have To)
Made some proper schoolboy errors when I started doing this. The first time, I made the paste way too wet. Ended up with bicarbonate soup all over my kitchen floor. Took ages to clean up.
Also tried to rush the drying process once by sticking my trainers in the tumble dryer. Big mistake. They came out looking like something from a charity shop; they were all wonky and the sole was peeling off. Gutted doesn’t cover it.
Don’t scrub too hard on fancy trainers either. Those ones with sparkly bits or special prints don’t appreciate aggressive treatment. Found that out when I nearly scrubbed the logo off my mate’s expensive Nikes. He wasn’t best pleased.
Different Trainers, Same Method
Canvas ones like Converse are brilliant for this method. The fabric really takes the paste well, and you can be quite firm with the scrubbing. I’ve brought some proper manky ones back from the dead.
Leather trainers need a gentler touch. Still works, but go easy with the brush. The bicarbonate won’t soak in as much, but it’ll still shift the surface dirt.
Mesh trainers are a bit awkward because the bicarbonate gets stuck in all the holes. Make the paste a bit runnier and rinse really thoroughly afterwards.
The Moment Of Truth
Those tragic Adidas I mentioned? They came up a treat. Not quite like new, but definitely respectable again. My brother actually asked if I’d bought new ones. Result.
The method’s dead simple, costs next to nothing, and uses stuff you’ve probably got knocking about already. My trainers stay cleaner for longer now too, which is an added bonus.
Reality Check Time
Look, this isn’t going to transform completely knackered trainers into pristine condition. If your shoes are properly falling apart, no amount of bicarbonate is going to help. But for everyday grime and the odd stubborn stain? It’s brilliant.
Takes a bit of effort though. You can’t just sprinkle some powder on and expect miracles. Need to put the work in with the scrubbing and be patient with the waiting.
Final Thoughts
How to clean trainers with bicarbonate of soda has become my go-to method now. Simple, cheap, effective. Emma’s earned herself many cups of tea for that bit of wisdom.
Next time your trainers are looking rough, give it a go. Worst case scenario, you’re out fifty pence and ten minutes of your time. Best case? Your trainers get a proper new lease of life.
Just remember to take your time, don’t rush the drying, and for the love of all that’s holy, don’t use your mum’s toothbrush.